Getting started in React with Webpack
tl;dr - Clone and run the source code.
Usually when starting to work on a React project, developers go with create-react-app. While this is a great option for many cases, I find it to be a bit too bloated, especially after ejecting it. In this post I’ll show you how to setup a React project with Webpack. If you prefer to use the Parcel Bundler instead of webpack, check out my post here.
To start let’s initialize a project.
npm init -yThen install the Webpack dependencies as dev dependencies.
npm install webpack webpack-cli -DAfter that let’s setup babel by installing the dev dependencies and creating the .babelrc file.
npm install @babel/core babel-loader @babel/preset-env @babel/preset-react -DOnce the dependencies are done installing create the .babelrc file in the project root with the following code.
{
  "presets": ["@babel/preset-env", "@babel/preset-react"]
}
Babel will allow us to use ES6+ feature in code without breaking the functionality for older browsers.
Next we need to configure babel to load all .js and .jsx files thorough the babel-loader. For that create the webpack.config.js file in the project root and enter the following configuration.
module.exports = {
  module: {
    rules: [
      {
        test: /\.(js|jsx)$/,
        exclude: /node_modules/,
        use: {
          loader: "babel-loader",
        },
      },
    ],
  },
};
Setup React
First install react, react-dom and react-router-dom (which we will use for routing).
npm install react react-dom react-router-domAfter that create the index.js file in the src folder.
import React from "react";
import ReactDOM from "react-dom";
import App from "./App.js";
Next let’s create the root component in the App.js file. The root component is going to contain the routing configuration.
import React from "react";
import { BrowserRouter as Router, Switch, Route } from "react-router-dom";

// Import pages
import Home from "./pages/home";
import About from "./pages/about";

const App = () => {
  return (
    <Router>
      <Switch>
        <Route path="/about">
          <About />
        </Route>

        <Route path="/">
          <Home />
        </Route>
      </Switch>
    </Router>
  );
};

export default App;
After that let’s create a layout for our pages. Create the folder components in src and in it create Layout.js. The layout component is also going to contain the navigation links within the app.
import React from "react";
import { Link } from "react-router-dom";

const Layout = ({ children }) => {
  return (
    <div>
      <nav>
        <Link to="/">
          <button>Home</button>
        </Link>

        <Link to="/about">
          <button>About</button>
        </Link>
      </nav>

      <main>{children}</main>
    </div>
  );
};

export default Layout;
Then let’s create the pages. In src create a folder called pages. The first page we are going to create is the home page.
import React from "react";
import Layout from "../components/Layout";

const Home = () => {
  return (
    <Layout>
      <h1>React Parcel Starter</h1>
    </Layout>
  );
};

export default Home;
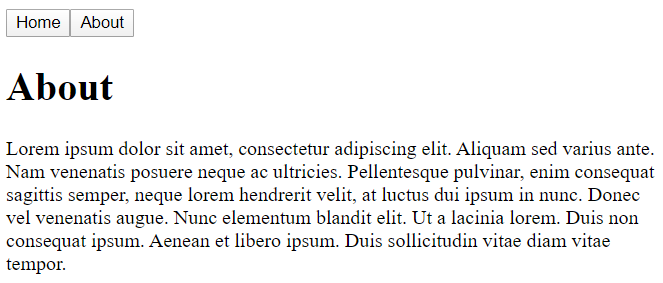
After that we will create the about page.
import React from "react";
import Layout from "../components/Layout";

const About = () => {
  return (
    <Layout>
      <h1>About</h1>

      <p>
        Lorem ipsum dolor sit amet, consectetur adipiscing elit. Aliquam sed
        varius ante. Nam venenatis posuere neque ac ultricies. Pellentesque
        pulvinar, enim consequat sagittis semper, neque lorem hendrerit velit,
        at luctus dui ipsum in nunc. Donec vel venenatis augue. Nunc elementum
        blandit elit. Ut a lacinia lorem. Duis non consequat ipsum. Aenean et
        libero ipsum. Duis sollicitudin vitae diam vitae tempor.
      </p>
    </Layout>
  );
};

export default About;
Connecting to a HTML file
Now we need to connect the javascript bundle to a HTML page. Webpack should output and an HTML page and place the javascript bundle in a <script> tag.
Install html-webpack-plugin and html-loader as dev dependencies.
npm install html-webpack-plugin html-loader -DThen update the webpack config.
const HtmlWebPackPlugin = require("html-webpack-plugin");

module.exports = {
  module: {
    rules: [
      {
        test: /\.(js|jsx)$/,
        exclude: /node_modules/,
        use: {
          loader: "babel-loader",
        },
      },
      {
        test: /\.html$/,
        use: [
          {
            loader: "html-loader",
          },
        ],
      },
    ],
  },
  plugins: [
    new HtmlWebPackPlugin({
      template: "./src/index.html",
      filename: "./index.html",
    }),
  ],
};
After that create the HTML file, index.html in the src folder.
<!doctype html>
<html lang="en">
  <head>
    <meta charset="UTF-8" />
    <meta
      name="viewport"
      content="minimum-scale=1, initial-scale=1, width=device-width, shrink-to-fit=no"
    />

    <title>React Webpack Starter</title>
  </head>
  <body>
    <div id="root"></div>
  </body>
</html>
Finally update the src/index.js file.
import React from "react";
import ReactDOM from "react-dom";
import App from "./App.js";

ReactDOM.render(<App />, document.getElementById("root"));
Webpack development server
If you want to run the project in the development mode you’ll need the webpack-dev-server dependency.
npm install webpack-dev-server -DNext add the dev script in package.json.
{
  "scripts": {
    "dev": "webpack-dev-server --open --mode development"
  }
}
Then all you need to start the development server is the following command.
npm run devProduction build
To get the production build of the project which is optimized add these scripts to package.json.
{
  "scripts": {
    "dev": "webpack-dev-server --open --mode development",
    "build": "webpack --mode production",
    "prestart": "npm run build",
    "start": "serve dist"
  }
}
To serve the production build let’s use the serve dependency.
npm install serve -Dbuild- Will get build the production version of the project.start- Will start the app.
When you visit localhost:5000 in your browser after running npm start, you should be seeing

When you navigate to “About” you should see

Now you can continue creating your React app as usual from here. The source code for everything done here is available in GitHub.